1 Request 域
在 SpringMVC 中,一般在进行页面跳转时,都会带上该处理器处理完成的数据。我们都知道,SpringMVC 的底层是封装了 Servlet 的代码,所以在 SpringMVC 中可以使用 Servlet 中的域对象,当然 SpringMVC 也额外给我们封装一些其它的域对象供我们使用,如 Model、ModelMap。
注:Model、ModelMap 和 Map 的底层其实都是封装了 Request 请求。
Themeleaf 视图前端获取 mavAttrName1 对象属性的代码:
Request 域
<p th:text="${mavAttrName1}"></p>
Session 域
<p th:text="${session.mavAttrName1}"></p>
Application 域
<p th:text="${application.mavAttrName1}"></p>
1.1 使用 ModelAndView 对象(推荐)
ModelAndView 我们平时中使用的最多的,它表示封装了 ModelMap 请求域和视图的对象(即数据模型+视图)。使用步骤如下所示:
- 首先 new 一个 ModelAndView 实例
- 使用
addObject()设置需要像页面传输的数据 - 使用
setViewName()设置需要跳转的视图页面 - 最后将 ModelAndView 对象返回
- 这样前台就可以通过 EL 表达式
${name}获取数据了
@RequestMapping("/modelAndView")
public ModelAndView testModelAndView() {
    ModelAndView modelAndView = new ModelAndView();
    modelAndView.addObject("mavAttrName1", "mavAttrValue1");
    modelAndView.addObject("mavAttrName2", "mavAttrValue2");
    modelAndView.setViewName("success");
    return modelAndView;
}
如果要在 ModelAndView 中使用转发和重定向也可以在 setViewName() 中设置。
//转发
modelAndView.setViewName("forward:/WEB-INF/pages/show.jsp");

//重定向,注:重定向不能访问/WEB-INF资源,因为是两次请求
modelAndView.setViewName("redirect:/hello.jsp");
1.2 使用 HttpServletRequest 对象
这是 Servlet 中原生的 Request 域对象。
@RequestMapping("/requestAttrRequest")
public String requestAttrRequest(HttpServletRequest request) {
    request.setAttribute("grapeAttrName", "grapeAttrName");
    return "success";
}
1.3 使用 Model 对象
在方法中将 Model 以形参的形式设置,使用 addAttribute 设置要传输的数据(注意是 addAttribute 属性,不是 setAttribute)。返回值就是页面名称,这种方式比较常用。
@RequestMapping("/requestAttrModel")
public String requestAttrModel(Model model) {
    model.addAttribute("username", "张三");
    model.addAttribute("password", "123456");
    return "success";
}
1.4 使用 Map 对象
@RequestMapping("/requestAttrMap")
public String requestAttrMap(Map<String, Object> map) {
    map.put("mapName", "mapValue");
    return "success";
}
1.5 使用 ModelMap 对象
ModelMap 是个 Map 集合可以使用 Map 的基本功能,ModelMap 也定义了 addAttribute() 方法。
@RequestMapping("/requestAttrModelMap")
public String requestAttrModelMap(ModelMap modelMap) {
    modelMap.addAttribute("username", "张三");
    modelMap.put("password","123456");
    return "success";
}
1.6 Model、ModelMap、Map 的关系
Model、ModelMap、Map 类型的参数其实本质上都是 BindingAwareModelMap 类型的。在控制器方法中使用这些对象时,可以通过 xxx.getClass().getName() 来查看到均属于 BindingAwareModelMap 类型。
org.springframework.validation.support.BindingAwareModelMap
public interface Model{}
public class ModelMap extends LinkedHashMap<String, Object> {}
public class ExtendedModelMap extends ModelMap implements Model {}
public class BindingAwareModelMap extends ExtendedModelMap {}- Map → LinkedHashMap → ModelMap
- Model + ModelMap → ExtendedModelMap → BindingAwareModelMap
1.7 更深了解 ModelAndView
打断点 → 开启 debug 模式运行 → 访问 /testRequestByServletAPI → IDEA 出现 Debugger 数据。
- 中间黄色的部分,函数调用链
- 右侧部分,各个属性的值
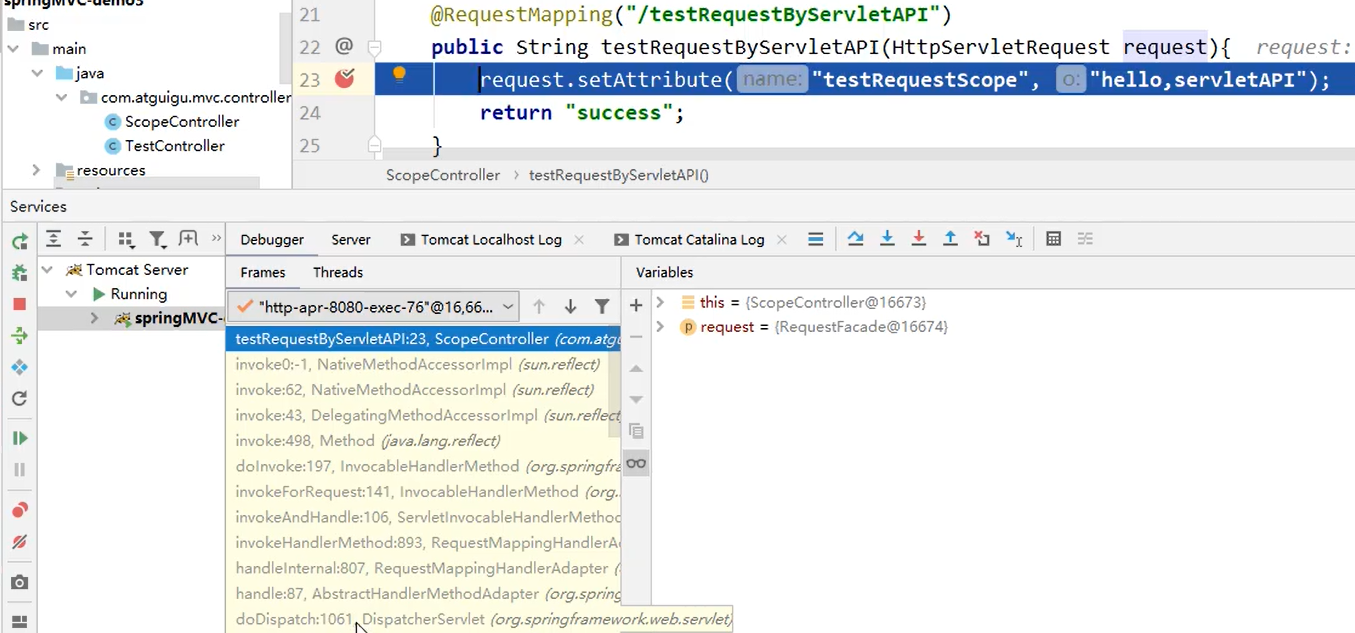
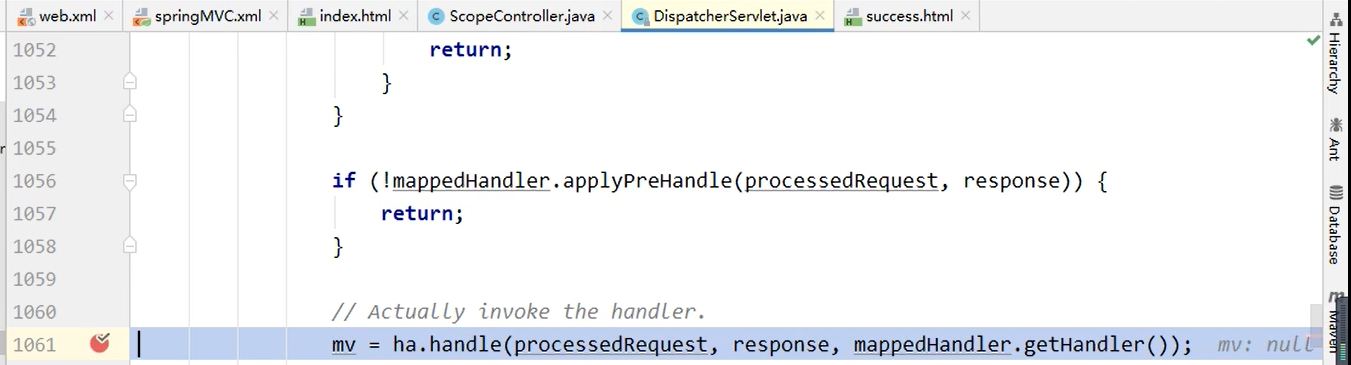
发现 DispatcherServlet 方法,点击进入。
2 Session 域
向 session 域存入数据,真正有效的办法只有一个,直接使用 Servlet 原生的 Session 域对象
@RequestMapping("/sessionAttr")
public String sessionAttr(HttpSession session) {
    session.setAttribute("sessionAttrName", "sessionAttrValue");
    return "success";
}
3 Application 域
向 application 域存入数据需要先拿到 ServletContext 对象。前面介绍过获取 ServletContext 对象的两种方法。拿到 ServletContext 对象后调用 setAttribute()方法,即可,用的比较少,可以用来加载网页中不经常改变的数据。
@Autowired
private ServletContext servletContext;

@RequestMapping("/application/scope")
public String applicationScope() {
    servletContext.setAttribute("appName", "appValue");
    return "success";
}

// ----- 下面是另一种方法

@RequestMapping("/testApplication")
public String testApplication(HttpSession session){
	ServletContext application = session.getServletContext();
    application.setAttribute("testApplicationScope", "hello,application");
    return "success";
}